Spring Boot 2.7 + JPA + GraphQL 예제
개요
SpringBoot + JPA + GraphQL을 이용한 간단한 예제 프로젝트 구현
프로젝트 구성
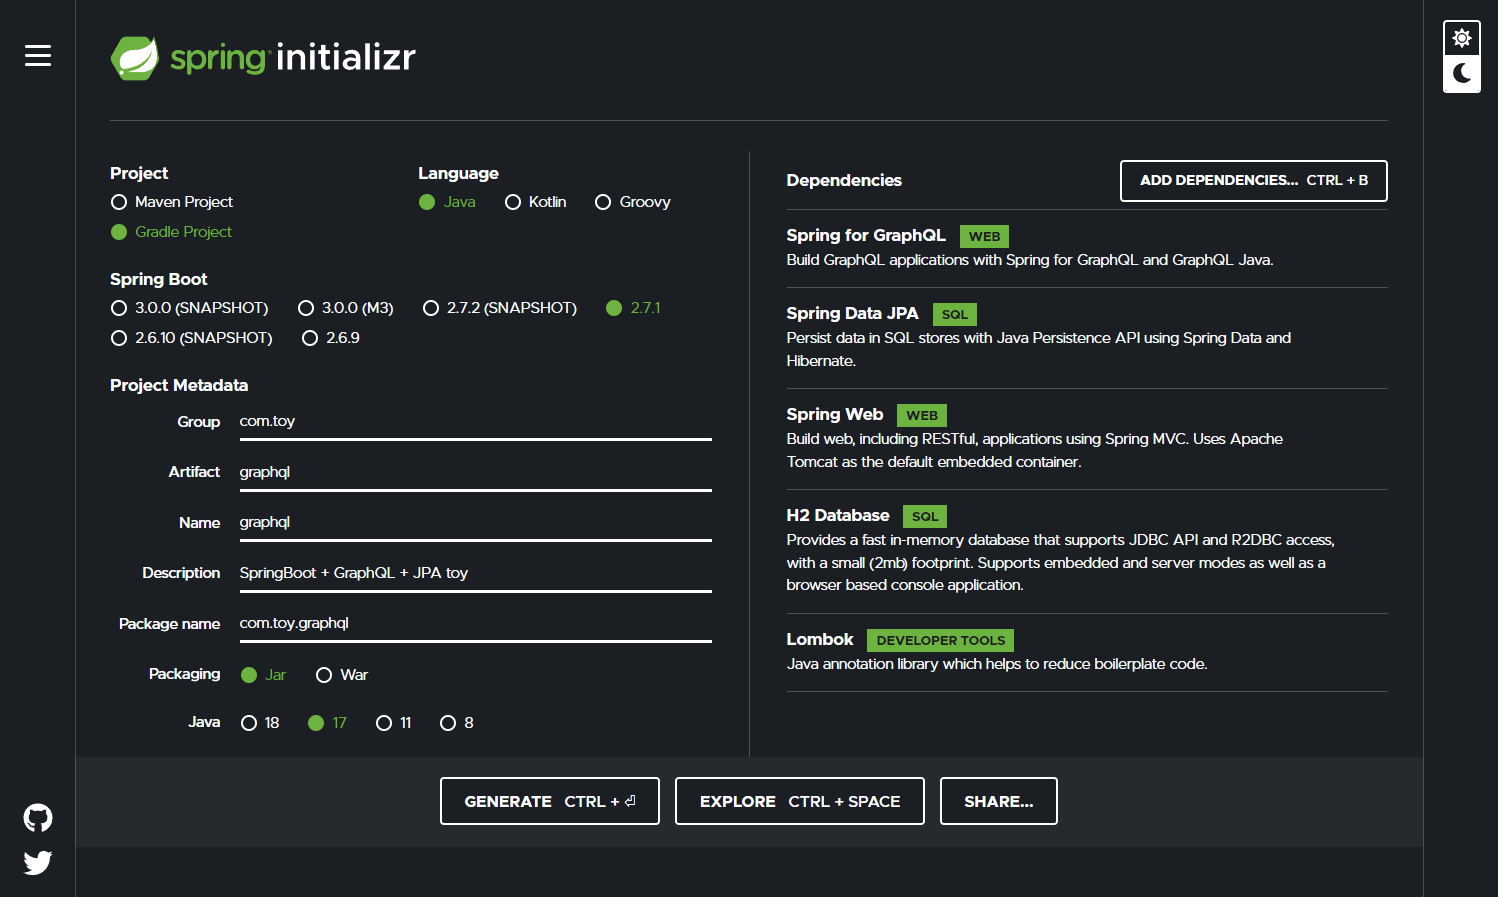
Java 17
Spring Boot 2.7.1
Gradle
Dependencies
- Spring for GraphQL
- Spring for JPA
- Spring Web
- H2 Database
- Lombok
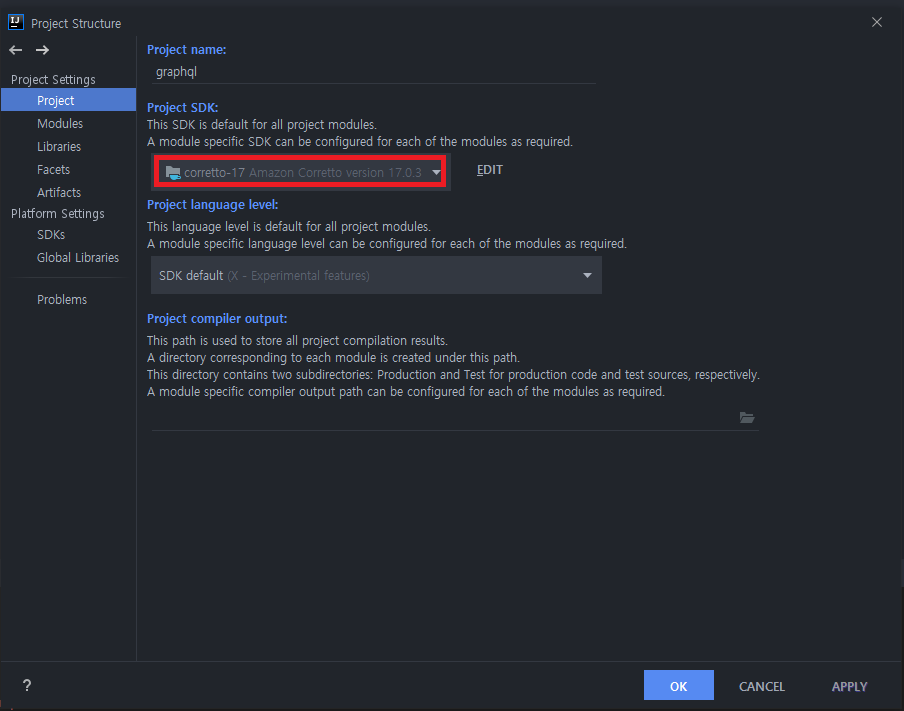
IntelliJ 프로젝트 환경 구성
1. File > Project Settings > Project > Project SDK Java17로 변경
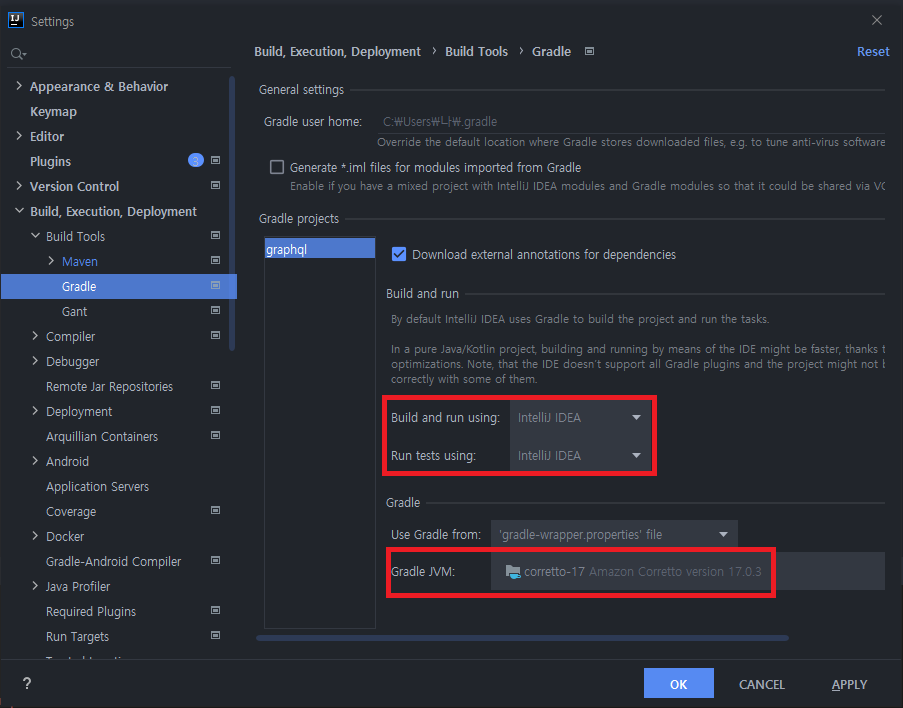
2. Settings > Build, Execution, Deployment > Build Tools > Gradle 설정 변경
Bulid and run using: Intellij IDEA
Run tests using: Intellij IDEA
Gradle JVM: Java 17
프로젝트
1. application.properties 수정(db 설정)
spring.h2.console.enabled=true
spring.datasource.generate-unique-name=false
spring.datasource.name=dbPerson

spring.jpa.show-sql=true

spring.graphql.graphiql.enabled=true
* 프로젝트 빌드 후 h2콘솔 접속 테스트
1. http://localhost:8080/h2-console/ 접속
2. Saved Settings: Generic h2(Server) 선택
3. JDBC URL: jdbc:h2:mem:dbPerson 변경
접속 확인
2. entity 정의
a. model 패키지 생성(path: graphql/src/main/java/com/toy/graphql/ 하위)
b. Address entity 생성
@Entity
@Getter
@Setter
@ToString
@NoArgsConstructor
public class Address {

	@Id
	@GeneratedValue(strategy = GenerationType.AUTO)
	private Integer id;
	private String address;
	private String city;
	private String state;
	private String zip;

	public Address(String address, String city, String state, String zip) {
		this.address = address;
		this.city = city;
		this.state = state;
		this.zip = zip;
	}
}
c. Person entity 생성
@Entity
@Getter
@Setter
@ToString
@NoArgsConstructor
public class Person {

	@Id
	@GeneratedValue(strategy = GenerationType.AUTO)
	private Integer id;
	private String firstName;
	private String lastName;
	private String phoneNumber;
	private String email;

	@OneToOne(cascade = CascadeType.ALL, fetch = FetchType.LAZY)
	@JoinColumn(name = "addressId", referencedColumnName = "id")
	private Address address;

	public Person(String firstName, String lastName, String phoneNumber, String email, Address address) {
		this.firstName = firstName;
		this.lastName = lastName;
		this.phoneNumber = phoneNumber;
		this.email = email;
		this.address = address;
	}
}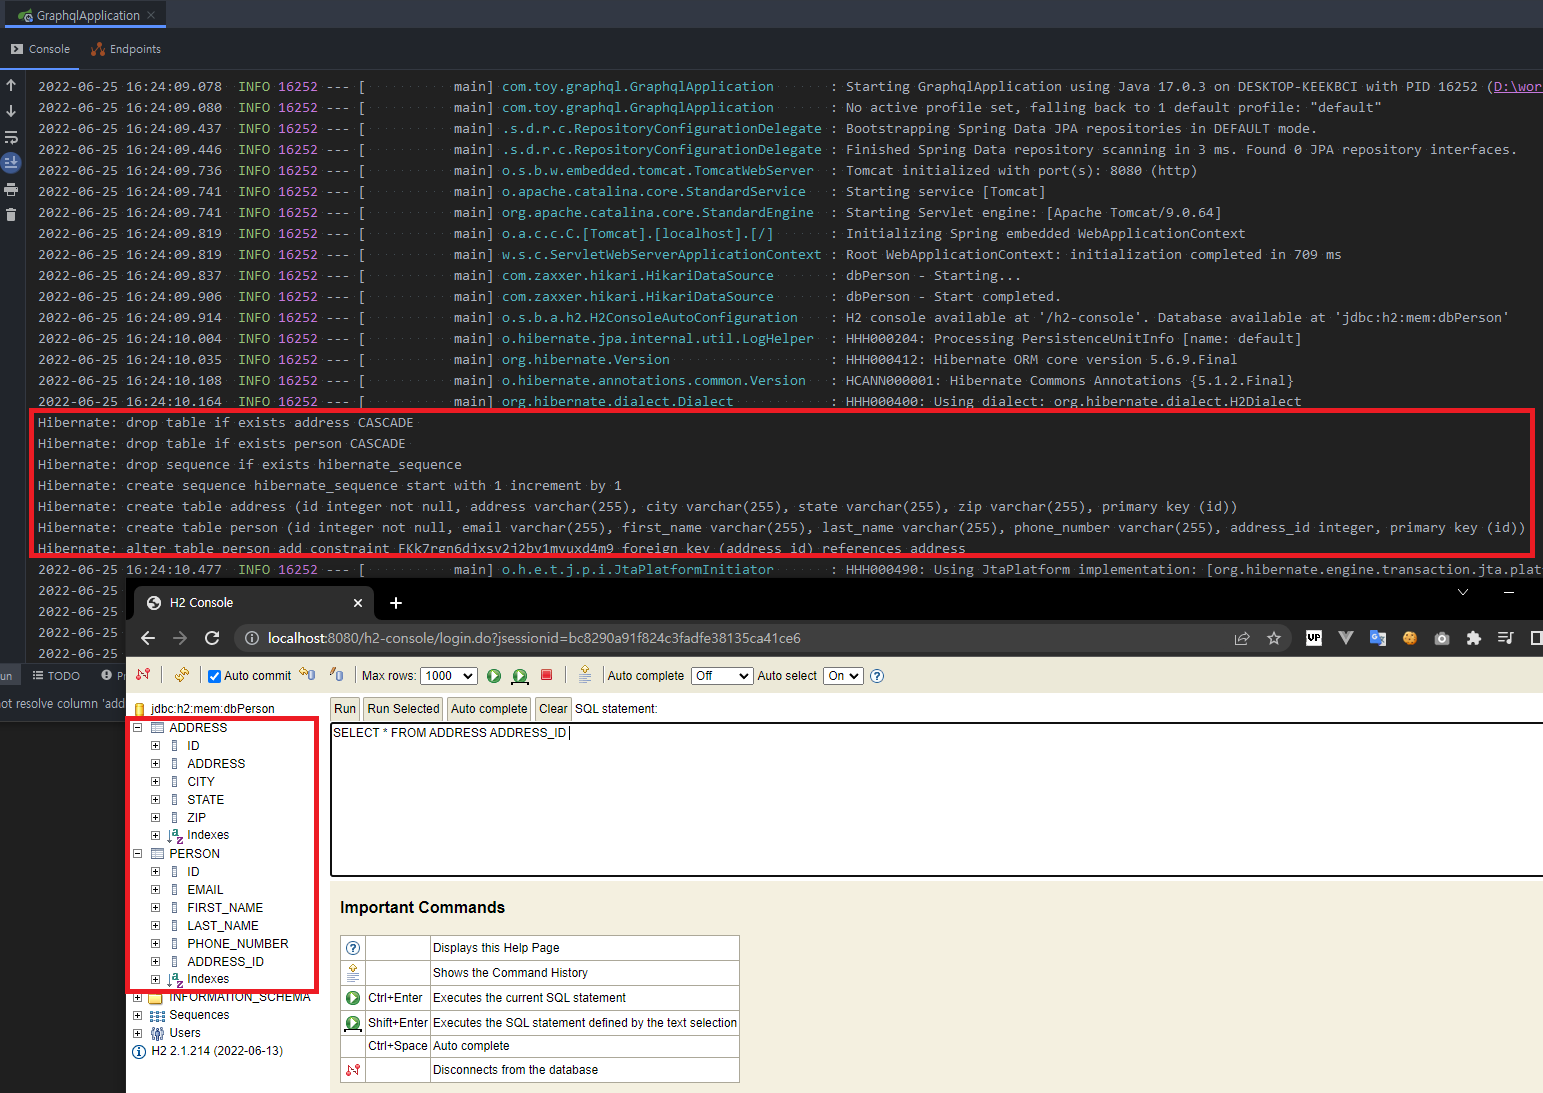
* entity 작성 후 프로젝트 재빌드시, h2 콘솔에 작성한 entity 테이블 생성 확인
3. PersonRepository 생성(JpaRepository 상속)
package com.toy.graphql.repository;

import com.toy.graphql.model.Person;
import org.springframework.data.jpa.repository.JpaRepository;

public interface PersonRepository extends JpaRepository<Person, Integer> {
}
4. 테스트용 데이터 생성
* h2-console 에서 테스트 데이터를 직접 insert하는 방법도 있지만, 해당 예제에서 사용하고 있는 h2 db의 경우 memory에 데이터를 저장하고 있어, 빌드시마다 데이터가 초기화 된다.(실제 서비스 적용시에는 별도 DB로 데이터 구성)
해당 예제에서는 CommandLineRunner 인터페이스를 사용하여, 빌드시마다 몇가지 데이터가 자동으로 세팅되도록 구성
a. SampleDataLoader 클래스 생성(CommandLineRunner 인터페이스 사용)
package com.toy.graphql.data;

import com.toy.graphql.model.Address;
import com.toy.graphql.model.Person;
import com.toy.graphql.repository.PersonRepository;
import org.springframework.boot.CommandLineRunner;
import org.springframework.stereotype.Component;

@Component
public class SampleDataLoader implements CommandLineRunner {
	private final PersonRepository personRepository;

	public SampleDataLoader(PersonRepository personRepository) {
		this.personRepository = personRepository;
	}

	@Override
	public void run(String... args) throws Exception {
		// 임시 데이터 1
		Person person = new Person("Corn",
				"kk99",
				"010.9999.9999",
				"gamil@gmail.com",
				new Address("Street","City","State","99999"));
		personRepository.save(person);

		// 임시 데이터 2
		person = new Person("Gildong",
				"Kim",
				"010.0000.0000",
				"gg@gg.com",
				new Address("st","99City","-","90081"));
		personRepository.save(person);

		// 임시 데이터 3
		person = new Person("Suo",
				"Ya",
				"010.0000.0000",
				"ya@suo.com",
				new Address("Qst","Wind-City","QWER","030"));
		personRepository.save(person);
	}
}
5. GraphQL 설정
graphql/src/main/resources/ 하위 graphql 디렉토리 생성 및 schema.graphqls 생성
type Query {
    findAll: [Person]
    findById(id: ID!): Person
}

type Person {
    id: ID!
    firstName: String
    lastName: String
    phoneNumber: String
    email: String
    address: Address
}

type Address {
    id: ID!
    address: String
    city: String
    state: String
    zip: String
}
6. PersonController 생성(GraphQL Schema Mapping Controller)
package com.toy.graphql.controller;

import com.toy.graphql.model.Person;
import com.toy.graphql.repository.PersonRepository;
import org.springframework.graphql.data.method.annotation.Argument;
import org.springframework.graphql.data.method.annotation.SchemaMapping;
import org.springframework.stereotype.Controller;

import java.util.List;
import java.util.Optional;

@Controller
public class PersonController {

	private final PersonRepository personRepository;

	public PersonController(PersonRepository personRepository) {
		this.personRepository = personRepository;
	}

	@SchemaMapping(typeName = "Query", value = "findAll")
	public List<Person> findAll() {
		return (List<Person>) personRepository.findAll();
	}

	@SchemaMapping(typeName = "Query", value = "findById")
	public Optional<Person> findById(@Argument Integer id) {
		return personRepository.findById(id);
	}
}
7. 프로젝트 빌드 후 GraphiQL(GraphQL IDE) 접속 후 데이터 확인
http://localhost:8080/graphiql 접속
a. findAll 테스트
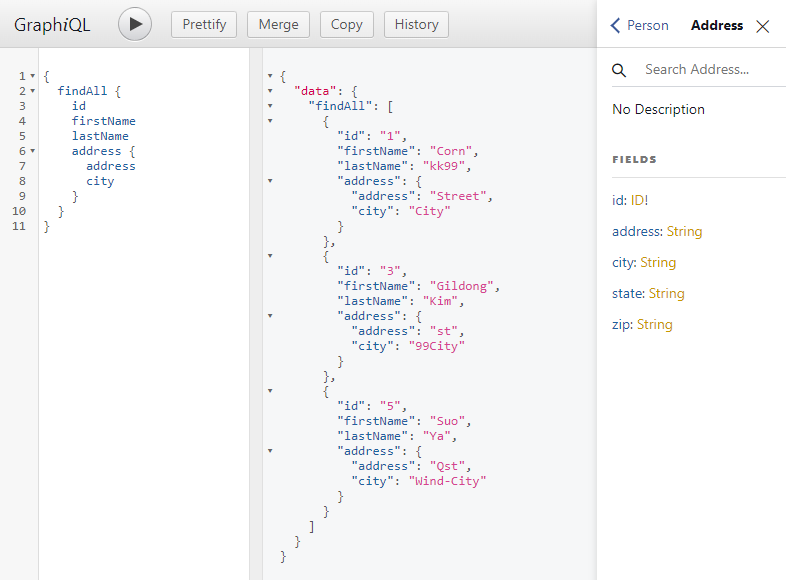
b. findById 테스트

해당 예제 프로젝트에서는 간단한 GraphQl 조회(Query)에 대한 내용만 살펴보았습니다.
해당 포스팅에 사용된 예제 프로젝트는 Github에서 확인 가능합니다.
https://github.com/kk99corn/ToyGraphQL
GitHub - kk99corn/ToyGraphQL: ToyGraphQL
ToyGraphQL. Contribute to kk99corn/ToyGraphQL development by creating an account on GitHub.
github.com
참조
https://www.danvega.dev/blog/2022/05/12/spring-data-jpa-pagination/